Showing posts with label onion. Show all posts

Monday, September 24, 2012

Butternut squash soup

It's starting to feel like fall! Time to put that 10-liter soup pot to work.

2 tbsp olive oil
2 large onions, chopped
1-2 tbsp fresh ginger (optional)
4 small-medium butternut squash, seeded, peeled & chopped
Salt + pepper
2 cups vanilla or plain almond milk
Cinnamon, to taste


Photo from WikiMedia Commons
Heat olive oil in a large soup pot on medium-high heat. Add onions and cook, stirring often, until they soften a bit (5 min). Add butternut squash, ginger, salt and pepper. Cook, stirring often, until squash begins to soften (10 min). Add almond milk and enough water to just cover the veggies. Bring down to a simmer and cover for 20-30 min or until all veggies are tender. Add cinnamon and more salt + pepper to taste. Blend with an immersion blender if you have one, or let the soup cool a bit before pureeing it in a blender or food processor. I like to puree this soup just enough that it gets creamy, but not enough that it loses all texture. Enjoy!

Tuesday, August 14, 2012

Summer squash frittata

6 eggs
grated cheese
salt + pepper + red pepper flakes
butter or oil for pan

1 tbsp olive oil
salt
1 onion
1 - 2 yellow squash / zucchini, sliced thinly
3 - 4 small potatoes, sliced thinly
4 cherry tomatoes
handful or two of basil, chopped
more grated cheese
balsamic reduction, if you're feeling fancy


I don't have a cast iron skillet (yet), so I make frittatas by baking them - without starting them on the stovetop. Bear with me.

Preheat oven to 450 and grease a small baking dish or pie dish. Beat the eggs, salt, pepper and red pepper flakes in a small bowl and mix in some grated cheese. Set aside.

Heat the olive oil in a skillet and add onions and salt. Saute until tender, 5 minutes or so. Add yellow squash / zucchini, potatoes and tomatoes (and whatever else you want to use up, of course). Cover and cook for another 3-5 minutes, until vegetables are tender. 

Pour eggs and veggie mixture into baking dish. Bake for 10 minutes. Remove from oven, top with basil and grated cheese. Return to oven and bake for another 5 minutes. Remove from oven, drizzle with balsamic reduction, and serve. 

Friday, August 10, 2012

Corn & black bean salad

Sweet corn! How sweet it is. I had some dried black beans on hand and (after soaking and cooking them on Thursday), tossed this up last night. All the veggies I used were from my CSA share, except the jalapeno I picked fresh from my container garden(!) I usually finish this off with some chopped cilantro but didn't have any on hand. Chopped bell peppers are a nice addition, too. Happy August!


6 ears fresh corn
2-3 cups cooked black beans (1 can drained & rinsed is fine)
few handfuls cherry tomatoes, halved or quartered
1 jalapeno, diced
1 bunch scallions (and/or some diced onion)
juice of 2-3 limes
1 tbsp cumin
salt & pepper, to taste
(optional) chopped avocado, if you want to get really serious

Cut corn (raw) off of cobs. Toss all ingredients in a large bowl and enjoy. This is especially delicious after it marinates in the fridge for a few hours or overnight. Delicious the next day for lunch!

Sunday, August 14, 2011

Chickpea Summer Squash Curry

I usually end up grilling summer squash or scrambling it with eggs and whatever other veggies I have on hand, but it's also delicious in a curry! Any variety of summer squash or zucchini will work here, and next time I'll try adding some hot peppers in addition to the bell.

Ingredients:
  • 2 tablespoons olive oil
  • 1 onion, chopped
  • 1 can chickpeas, drained and rinsed
  • 4-6 summer squash, cubed
  • 1 bell pepper, thinly sliced
  • 2 cups veggie broth
  • 1 can light coconut milk
  • 2 tablespoons curry powder, plus more to taste
  • sea salt
  • juice of one lime (or lemon)
  • handful chopped basil
  • handful chopped scallions
Add the onion to the olive oil over medium heat and saute for a few minutes, until the onions begin to soften. Add chickpeas, summer squash, pepper, broth, coconut milk, and curry powder. Simmer for 10-15 minutes until veggies are cooked through and curry reduces a bit. Remove from heat. Add salt, lime juice, basil, scallions, and more curry powder to taste. Delicious over brown or wild rice.

Sunday, July 10, 2011

Pickled yellow squash

I love pickled everything. I love the taste, of course. But I also love the fact that pickling expands shelf life of precious vegetables.

My pickling technique is something I learned from my Aunt. It's quick, easy and most importantly, YUMMY!

This yellow squash pickles can be stored in the fridge for up to 1-2 weeks. I honestly don't know because I usually finish eating them in 3 days. :) It goes very well with any meat dish!

Ingredients

6 yellow squash (last week's squash were very small, so if normal size, use 3-4)
2 small onions (I used last week's onions)
1.5 cups of white vinegar
3/4 cup of water
1/2 cup of sugar
2 Tbs kosher salt
1tsp mustard seeds
1tsp celery seeds
1-2 green chilli (Jalapeno), optional


1. Put vinegar, water, sugar, salt, mustard seeds and celery seeds in the pot.
2.Let it boil.
3.Wash yellow squash and onions.
4. Slice them. I sliced squash thinly so I can pack it in the jar.
5. If you are going to put chilli, I recommend taking all the seeds out. Chop 'em.
6. Pack it in the jar.
7. When liquid boils, turn off the heat, gently pour it into the jar.
8. Close the lid when it's still hot.
9. Let it cool, and store in the fridge.

Tuesday, August 3, 2010

Celery Root Soup

Celeriac, also known as celery root or knob celery, is a kind of celery grown as a root vegetable for its large hypocotyl rather than for its stem and leaves. Unlike other root vegetables, which store a large amount of starch, celery root is only about 5-6% starch by weight. Celeriac has a celery flavor and is often used in soups and stews. It can also be mashed or used in casseroles, gratins, or baked dishes. Try this recipe, adapted from The Conscious Cook by Tal Ronnen. [Serves 6]
  • 3 tbsp. olive oil
  • 2 medium celery roots, peeled and cut into 1-inch cubes
  • 2 stalks celery, chopped
  • 1 large onion, chopped
  • 2 quarts broth
  • 1 bay leaf
  • 1 cup thick Cashew Cream* (see below)
  • freshly ground black pepper
  • 1 unpeeled Granny Smith apple, very finely diced (optional, for garnish)
Place a large stockpot over medium heat. Sprinkle the bottom with a pinch of salt and heat for 1 minute. Add the oil and heat for 30 seconds, being careful not to let it smoke. This will create a nonstick effect.

Add the celery root, celery, and onion and sauté for 6-10 minutes, stirring often, until soft but not brown. Add the stock and bay leaf, bring to a boil, then reduce the heat and simmer for 30 minutes. Add the cashew cream and simmer for an additional 10 minutes.

Working in batches, pour the soup into a blender, cover the lid with a towel (the hot liquid tends to erupt), and blend on high. Season with salt and pepper to taste. Ladle into bowls. Place a spoonful of the diced apple in the center of each serving.

*To make 1 cup of Cashew Cream, place 2/3 cup whole raw cashews (not pieces, which are often dry), rinsed very well under cold water, in a blender with enough fresh cold water to cover them by 1 inch. Blend on high for several minutes until very smooth. Cashew cream is a vegan-chef staple and can be stored 2-3 days in the refrigerator or in the freezer for up to 6 months (although after it's defrosted it can be a bit lumpy, so it's good to give it a spin in the blender to smooth it out before using it).

Photo courtesy of Wikipedia

Wednesday, June 9, 2010

Palak Paneer (spinach)

I used two shares worth of spinach (I traded in my garlic scape for a 2nd spinach, via the handy new swap-box feature) to make Palak - minus the Paneer, since I didn't have any cheese. Delicious! Tonight, if I'm feeling adventurous, I may try the same recipe but with chard instead.

From allrecipes.com: http://allrecipes.com/Recipe/Absolutely-Perfect-Palak-Paneer/Detail.aspx

6 tablespoons olive oil
2 cloves garlic, chopped
1 tablespoon grated fresh ginger root
2 dried red chile peppers
1/2 cup finely chopped onion
2 teaspoons ground cumin
1 teaspoon ground coriander
1 teaspoon ground turmeric
3/4 cup sour cream
3 pounds fresh spinach, torn
1 large tomato, quartered
4 sprigs fresh cilantro leaves
8 ounces ricotta cheese
Salt to taste

In a large saucepan heat 3 tablespoons of olive oil and saute garlic, 1/2 tablespoon of ginger, red chilies (optional ingredient) and onion until brown. Mix in the cumin, coriander, turmeric and sour cream (add more or less to achieve desired creaminess). Add the spinach, handfuls at a time until it is cooked down, about 15 minutes total. Remove from heat and allow to cool slightly.

Pour spinach mixture into a blender or food processor and add the tomato, the remaining 1/2 tablespoon of ginger, and cilantro (add more or less according to taste). Blend for 15 to 30 seconds, or until the spinach is finely chopped. Pour back into the saucepan and keep warm over low heat.

In a medium frying pan heat 3 tablespoons of olive oil over medium heat, and fry cheese until browned; drain and add to spinach. Cook for 10 minutes on low heat. Season with salt to taste.

- Brent
Wednesday, November 4, 2009

Swiss Chard, Sausage and Ricotta Pie

This recipe is from our Homewood CSA member Julia Galeazzi! It was a hit at her recent dinner party.

From the September/October 2009 issue of "Tastes of Italia":

As soon as there is a cool breeze in the air, you will love this "green" pie. Of course, you may use spinach, but try this with cooked Swiss chard. Serve it hot, although it is delicious at room temperature also. This is a conversation piece. your family and friends will want to know what's inside the pie.

1/2 pound Italian sausage
2 tablespoons olive oil
1 cup finely chopped onions
2 cups cooked Swiss chard, drained well*
1 cup grated Parmesan cheese
1 cup ricotta
4 eggs, lightly beaten
Salt and freshly ground pepper
2 prepared pastry crusts, such as Pillsbury
1 egg white, beaten

Remove sausage from casing and crumble it in a large saucepan with the olive oil. Brown it 8 to 10 minutes, remove with a slotted spoon and set aside.

There should be about 2 to 3 tablespoons fat in the pan; if there is more remove and discard or reserve for another use. Saute onions 5 minutes until they turn color.

Remove pan from the heat, and add the cooked Swiss chard. Mix it with the onions. Then, add the Parmesan and ricotta cheeses, 4 beaten eggs and the sausage meat, and mix well. Salt and pepper to taste.

Preheat oven to 400 degrees. Fit one pastry into the bottom of a 10-inch pie dish. Brush the inside of the pastry, including the sides, with the beaten egg white, reserving a bit for the top pastry, and fill the pie. Cover with the second pie crust, merging the 2 crusts into a decorative pattern, and brush the remaining egg white over the top. With a sharp knife, make 4 or 5 small slits in the top pastry. Bake for about 40 minutes until a rich golden color is achieved. Remove from oven, rest a few minutes and slice.

Makes 8 servings.

*To cook Swiss chard: discard overgrown leaves, remove white stems and peel them (as if destringing celery stalks) and cut into 1-inch lengths. Chop leaves into 1-inch square pieces and cook in salted boiling water with stems. Drain very well and finish them off in 2 tablespoons olive oil with 2 garlic cloves. Remove cloves and cool and then add to the other ingredients in the filling.

Julia's notes: I omitted the salt, and it came out fine. The part that takes the longest is washing and cooking the swiss chard. If you don't have all day or the patience to prep, I suggest you buy pre-washed spinach and skip the cooking in boiling water. You can just go to the "finish in olive oil and garlic" step, which I did in a saute pan. (Spinach leaves wilt quickly in a saute, unlike swiss chard, which requires the boiling first.) Also, when the recipe says to "rest a few minutes", I'm pretty sure that means to rest the pie, but it is also a good time to take a rest yourself before digging in! Enjoy :)

Monday, November 2, 2009

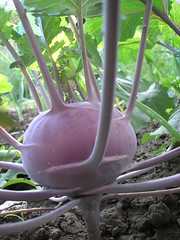
Kohlrabi


Kohlrabi is a relatively unknown vegetable in the Americas, so good and easy recipes can be hard to come by. Luckily, though, kohlrabi is a surprisingly versatile food to work with. You can substitute most dishes with broccoli, potatoes, or turnips with kohlrabi to change up some of your normal meals, or add it to soups or sautes. It sure is an odd thing to behold, but once you try kohlrabi for the first time, you'll be wanting more. The following recipes are ones that I've been able to try out in the short time I've had since discovering it. Feel free to respond with some of your favorite kohlrabi dishes - I am also looking for more to try!


Easy Roasted Kohlrabi

1-1 1/2 lbs. kohlrabi, skinned and diced
a tablespoon or so of olive oil (enough to coat the kohlrabi)
1-2 cloves of garlic, minced
salt to taste
good vinegar

Directions: Preheat the oven to 450 degrees F. Toss the diced kohlrabi in the olive oil, adding the garlic and salt as you mix (feel free to add additional herbs and spices to your taste). Spread evenly on a baking sheet and roast in the oven for about 30 minutes, stirring every once in a while. Kohlrabi should be tender when poked with a fork. Sprinkle with a good vinegar right before serving.

Kohlrabi Puree
courtesy of http://www.foodiefarmgirl.blogspot.com

4 kohlrabi bulbs with leaves
2 tablespoons extra virgin olive oil
1 large onion, chopped
3 cloves garlic, minced
4 ounces mushrooms, quartered
3 tablespoons cream (or milk, water, stock, or olive oil - whatever you have on hand)
salt and pepper, to taste

Directions: Trim the kohlrabi bulbs, peeling them if the skins seem tough. Rinse the leaves (discarding any that are yellow) pat them dry, and coarsely chop. Set aside. But the bulbs into 1-inch chunks. Bring a saucepan of lightly salted water to a boil, and add the kohlrabi chunks. Reduce the heat and simmer until tender, about 15 minutes. Meanwhile, heat the olive oil in a skillet. Add the onion and sauté over medium-low heat until softened, about 5 minutes. Add the garlic and cook, stirring, another 1 to 2 minutes. Do not let garlic brown. Add the mushrooms and the reserved kohlrabi leaves to the skillet. Cover, and cook 5 minutes. Then uncover, and cook, stirring, until all the liquid has evaporated, 3 minutes. Set the skillet aside. Drain the kohlrabi chunks and place them in the bowl of a food processor. Add the mushroom mixture and all the remaining ingredients. Purée until smooth. Transfer the purée to a saucepan and reheat over low heat, stirring, 2 minutes.

Kohlrabi & Apple Slaw with Creamy Coleslaw Dressing

adapted from A Veggie Venture blog

1 pound kohlrabi, peeled and grated
2 apples (or enough to equal the quantity of the kohlrabi), peeled and grated
1/4 cup cream
1 tablespoon fresh lemon juice
1/2 tablespoon good mustard
1/2 teaspoon sugar
salt and pepper, to taste
fresh mint, chopped
about a handful of craisins

Directions: whisk cream into light pillows, about a minute. Stir in all other ingredients, including the kohlrabi and apple. Serve immediately.

Monday, October 19, 2009

Bell Peppers

Bell peppers are really fun vegetables to cook with, offering many tasty combinations and possibilities. Their color keeps beautifully when cooked, and their shape allows for some really creative and fun serving options. Below are some of my favorite bell pepper recipe. They are delicious and each use peppers in a completely different way. Happy cooking!

Creole Stuffed Peppers
courtesy of Veganomicon: The Ultimate Vegan Cookbook
by Isa Chandra Moskowitz & Terry Hope Romero

4 large bell peppers
2 tablespoons olive oil
1 medium yellow onion, finely chopped
2 jalapeños, cut in half, seeded, and finely sliced
1 cup carrots, finely diced
4 cloves garlic, finely chopped
2 dried bay leaves
1 teaspoon dried oregano
1 teaspoon dried basil
2 teaspoons paprika
3 sprigs fresh thyme (or 1 teaspoon dried)
1 teaspoon salt
1 15-oz. can diced tomatoes
2 15-oz. cans black-eyed peas, drained and rinsed
1/4 cup chopped fresh parsley (or 1 teaspoon dried)

Directions: Preheat the oven to 350 degrees F and grease a 9x13-inch casserole dish with a little olive oil. Bring a large pot of water to a boil.

Cut the peppers in half lengthwise through the stem end. For aesthetic purposes, try to leave the stem intact on one side; if you can't manage it, no love lost. Remove the seeds and membranes. Submerge the peppers in the boiling water and cover. Let them boil for 5 minutes, then drain them immediately and rinse with cold water to cool them down a bit.

Meanwhile, heat the oil in a large skillet over medium-high heat. Saute the onions, jalapeños, and carrots for about 10 minutes. You want the veggies to brown, especially the carrots. If it looks like they are steaming rather than browning, then raise the heat a bit. Add the garlic about 5 minutes into the cooking process.

Add the bay leaves, the other herbs and spices, and the salt; saute for 1 more minute. Add the tomatoes and peas, stir and cover, and cook for 10 minutes. If it seems too liquidy then remove the cover and cook long enough to reduce some of the liquid. Mix in the parsley.

Remove the bay leaves and thyme sprigs. The mixture will be hot, so we find it's easier to just remove the herbs while filling the peppers; just be on the lookout for them.

Spoon a little less than 1/2 cup of the veggie mixture into each pepper half. Again, the filling will be hot, so be careful while you are handling it. Place the pepper halves in the casserole dish and bake for about 25 minutes.

Lemon-Garlic Chick Pea Dip with Bell Peppers
courtesy of Rachael Ray

1 15-oz. can chick peas, drained
1 clove garlic, cracked from its skin
1 lemon, zested and juiced
4 to 5 sprigs fresh thyme leaves, stripped from stems
coarse salt and pepper
a few drops hot sauce, to taste
1/4 or so of olive oil

Directions: combine all ingredients except olive oil into a food processor. While processing, stream in olive oil. Transfer to a dish, and serve with slices of raw bell pepper (and any other veggies you have on hand)!

Homemade Bell Pepper Pasta Sauce

2-3 tablespoons olive oil
1 medium onion, finely chopped
2-3 bell peppers of assorted colors, diced
4 cloves garlic, minced
2 cans diced tomatoes with Italian seasoning, coarsely pureed by hand (just mash with a fork)
2 tablespoons tomato paste
salt and pepper, to taste
crushed red pepper flakes, to taste
1/2 teaspoon sugar
fresh or dried basil, tarragon, parsley

Directions: Heat olive oil in a medium-sized saucepan. Add diced onion and saute until translucent, 5-7 minutes. Add the garlic, cooking until the garlic is fragrant, about another minute. While this is cooking, take the mashed diced tomatoes and add to it the tomato paste, herbs, pepper flakes, sugar, salt, and pepper. Pour this mixture into the onions, and simmer over medium heat for about 20 minutes, stirring occasionally. Add the diced bell peppers, and continue to cook until the peppers are tender. Serve over pasta of your choice.

Monday, October 12, 2009

Winter Squash

The following recipes were submitted by one of our CSA members, Allison Hauspurg. Winter squash are an especially versatile vegetable, and these recipes include more delicious fall and winter foods as well. Enjoy!

Apple Stuffed Squash

Preheat oven to 350. Slice the top off of your acorn squash, and scoop out all the strings & seeds (save the seeds!). Pour about 1/2 an inch of water into a casserole or pie dish or what-have-you, and place your squash top-down in the middle. Allow the squash to steam in the oven for 10-15 minutes. In the meantime, slice up 1/2 of a Gala apple (or other crunchy-sweet variety)–make sure to cut it into small, thin, slices (think overgrown confetti). Toss with some maple syrup, cinnamon, nutmeg, and a spoonful of Earth Balance or canola oil. Carefully remove the squash from the oven, and use a spoon to pack all your filling into the center. Place on a parchment-paper lined baking sheet and bake another 30-45 minutes (until it smells so good you can’t stand it).

Roasted Squash Seeds

Preheat oven to 350 or so. Wash your squash seeds (I used acorn squash, see previous recipe) really really well until there’s no pulp left. Pat them dry and place them in a small bowl. Drizzle with olive oil and toss until they’re all covered. Spread them out on a baking sheet (or on a piece of parchment paper on a baking sheet) and sprinkle with sea salt. Bake for 10-15 minutes, stirring one or twice, until they’re all nice and brown looking. I’m not sure how to store them, because they never last that long!



This last recipe is a favorite of mine from Food Network, and takes advantage of your butternut squash and your swiss chard at the same time in one delicious meal.

Penne with Braised Squash and Greens

2 teaspoons extra virgin olive oil
4 ounces cubed tofu
1 medium onion, chopped
3 cloves garlic, minced
crushed red pepper, to taste
1 1/2 cups vegetable broth
1 lb. butternut squash, peeled and cut into 3/4-inch cubes
1 bunch Swiss chard, stems removed and leaves cut into 1-inch pieces
8 ounces whole wheat penne, rigatoni, or fusili
1/2 parmesan cheese, grated
salt and pepper, to taste

Directions: Put a large pot of water on to boil for cooking pasta. Heat oil in a large nonstick skillet over medium heat. Add tofu and cook, stirring, until lightly browned, 3 to 5 minutes. Transfer to a plate. Add onion to the pan; cook, stirring often, until softened and golden, 2 to 3 minutes. Add garlic and crushed red pepper; cook, stirring, for 30 seconds. Return the tofu to the pan and add broth and squash; bring to a simmer. Cover and cook for 10 minutes. Add chard and stir to immerse. Cover and cook until the squash and chard are tender, about 5 minutes. Meanwhile, cook pasta until just tender, 8 to 10 minutes or according to package directions. Drain and return to the pot. Add the squash mixture, Parmesan, salt and pepper; toss to coat.

Sunday, August 23, 2009

Watermelon


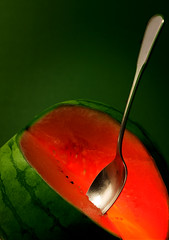
It's tempting to dig right in to a freshly cut raw watermelon, but if you can hold off long enough to make a recipe, the ones that follow will really be worth the wait. Melons are surprisingly versatile foods to work with, and complement many other flavors. They can be pureed into delicious salad dressings or cold summer soups, dressed with various sauces, or even grilled. Below are some of my favorite easy watermelon recipes. Summertime is never truly complete without some juicy, red watermelon, and these recipes really bring out the best of the summer season.

Simple Watermelon Basil Vinaigrette

4 cups watermelon, drained
1/4 cup red onion, chopped
2 tablespoons honey
1/4 cup champagne or apple cider vinegar
3/4 cup canola oil
2 tablespoons fresh basil, chopped
1 tablespoon fresh parsley, chopped
salt and pepper, to taste

Directions: Place all in ingredients in a blender. Pulse until fully mixed. Flavor with salt and pepper.

Paula's Easy Watermelon Dessert
courtesy of Paula Deen, FoodNetwork.com

1/4 cup pineapple juice
1/4 cup honey
1/4 cup lime juice
2 tablespoons salt
1 1/2 teaspoons ground ginger
1 watermelon (about five pounds)

Directions: Mix all ingredients except the watermelon together in a large bowl. Slice t
he watermelon, remove the seeds, and cut into cubes. Place into individual bowls, drizzle with the pineapple-honey-lime sauce, and serve.

Tomato, Watermelon, and Basil Skewers
courtesy of Giada De Laurentiis, FoodNetwork.com

1/4 cup balsamic vinegar
1/4 cup sugar
1 watermelon (4-5 lbs) cut into 32 (1 1/2 inch) cubes
32 small basil leaves
16 cherry tomatoes, halved
2 tablespoons extra virgin olive oil
kosher salt
special equipment: 16 skewers

Directions: Bring balsamic vinegar and sugar to a simmer over heat, mixing together until fully dissolved. Set aside. Starting with the watermelon, push cube to end of the skewer. Follow with a basil leaf, then a tomato half - then repeat once more. Drizzle with the balsamic sugar glaze, sprinkle with salt, and serve.

Watermelon Muffins
courtesy of Peggy Trowbridge Filippone, About.com

1-1/2 cups flour
2 teaspoons baking soda
1 teaspoon baking powder
1/8 teaspoon cinnamon
1/8 teaspoon salt
6 Tablespoons (3/4 stick) butter, at room temperature
2/3 cup sugar
2 eggs
1/2 cup sour cream
1 cup (about 1/8 medium seedless watermelon) watermelon juice with pulp (see Note)
Red food coloring, optional
3/4 cup miniature chocolate chips
Confectioners' sugar, optional

Directions: Preheat oven to 350 F. Line standard or miniature muffin tins with baking paper cups.

Whisk together flour, baking soda, baking powder, cinnamon, and sugar in a medium bow
l. Set aside. In a large bowl, cream butter and sugar. Beat in eggs. Add sour cream and watermelon, beating just until combined. (A few drops of red food coloring may be added to the batter to enhance the color to simulate watermelon.) Fold in chocolate chips.

Fill muffin tins 3/4 full. Bake 20 to 25 minutes for standard muffins or 15 to 18 minutes for mini-muffins. Place muffins on racks to cool. Just before serving, sift with powdered confectioners' sugar, if you wish.

Yield: 12 standard muffins or about 48 mini-muffins

Note: Cut seedless watermelon into cubes and process in a food processor or heavy-duty blender until thick with small bits of pulp still remaining. You will need 1 cup of processed watermelon.

Monday, August 10, 2009

Sweet Potato Leaves


This past week's CSA share brought with it my first culinary encounter with sweet potato leaves. I was a little bewildered at first, but soon learned of their versatility in many different types of dishes and ability to replace most other leafy greens in recipes. That being said, it is rather difficult to find sweet-potato-leaf-specific recipes anywhere. Since they are used mainly in Asian and Pacific Island cuisine, some people find it easiest to begin their search within those boundaries. The following recipes include a Filipino-style dish (courtesy of phillip-anna.blogspot.com) and one of my own that uses some traditional complementary flavors. The bottom line: as strange and daunting as the sweet potato leaf may be, it is surprisingly versatile and makes a great green for culinary exploration and experimentation. Enjoy!

Kamote (Sweet Potato Green) Salad – a traditional Filipino dish
Courtesy of phillip-anna.blogspot.com

2 cups sweet potato leaves (no stems)
Water for boiling
½ medium red onion, thinly sliced
½ cup tomatoes, sliced
White vinegar, to taste
Soy sauce, to taste
Salt, to taste
Cooked rice, optional

Directions: Rinse and drain sweet potato leaves. Bring water to a boil with a pinch of salt, put in leaves until tender and cooked through. Drain sweet potato leaves and transfer them to a bowl. Add red onion, tomato, vinegar, and soy sauce to taste, and toss thoroughly. Enjoy on its own or over cooked rice.


Simple Stir-Fried Sweet Potato Leaves

One bunch of sweet potato leaves (soft stems are okay to use, too)
1-2 tablespoons olive oil
1-2 dried chilies, minced or 1 ½ tsp. chili powder
2 cloves garlic, minced
Soy sauce, to taste
Salt and pepper, to taste

Directions: Bring water to boil with salt, blanch the sweet potato leaves for about two minutes. Drain and rinse with cold water. Heat oil in skilled over medium heat. Sauté garlic and chilies (or chili powder) until garlic is fragrant, about a minute, stirring often. Chop the leaves and add them to the skillet. Stir-fry for about three minutes, until leaves are dark and tender. Add soy sauce, salt, and pepper to taste.

Monday, August 3, 2009

Summer Time means Summer Squash


Well folks, we are in the peak of summer, and many of you have probably noticed that summer squash is also peaking as they pile up in your weekly CSA share or at your local farmers' market. It is easy to turn to the usual steamed or sauteed squash dish each night with dinner, but it can be equally easy to use them in a completely new and unique way with nearly the same ingredients and time. Because squash are so plentiful and popular in the US, a quick internet search of "summer squash recipes" will yield thousands of results. I personally use the Food Network site as my go-to recipe finder, but there are many other websites out there, and I highly suggest searching around for your own favorite. Here are a few squash and zucchini recipes that I love to get you started. Happy hunting!

Summer Squash Soup with Basil
courtesy of Food Network's Curtis Aikens
fresh basil, julienned
2 tablespoons olive oil
1 1/4 pounds summer squash of any variety, roughly chopped
1 large onion, chopped
6 cups vegetable stock*
1/2 cup basil, julienned
1 1/2 tablespoons butter, softened
1 1/2 tablespoons flour
Salt and pepper, to taste
Juice of 1 lemon
Sour cream or plain yogurt, optional
*I sometimes add a 1/2 cup or so of cream in place of that same amount of stock to help give it a thicker, creamier texture

Directions: Heat the oil in a large saucepan or stockpot, add zucchini and onion. Saute for 5 minutes or until onions are translucent and zucchini is crisp tender. Then add stock, bring to a boil, reduce heat and partially cover and cook for 25 minutes. Add basil during the last 5 minutes of cooking. Mix the butter and flour together into a paste. Remove 1 cup of simmering stock and whisk in butter mixture until smooth. Add back into soup, stir until thickened. Remove soup from heat to a blender and puree until smooth. Taste and season with salt and pepper. Add lemon juice and serve with a dollop of sour cream or yogurt. Serve with toasted sourdough bread, if desired.

Summer Squash Pancakes
courtesy of About.com's Diana Rattray

3 cups grated summer squash
1/2 teaspoon salt
1 tablespoon fresh chopped parsley
1-2 cloves garlic, minced
3/4 cup grated Parmesan cheese
1 large egg
1 cup biscuit mix
Pepper, just a dash or to taste
milk as needed

Directions: Combine all ingredients in a mixing bowl. Add enough milk as necessary to make a thin pancake-like batter. Drop by spoonfuls onto hot oiled griddle or skillet. Turn over when bottom is golden and cook until browned on both sides. Serve with butter, sour cream, or any desired topping.

Zucchini "Pizza"
courtesy of About.com's Diana Rattray

3 cups zucchini, grated
3 eggs, well beaten
1/2 cup flour
salt, to taste
2 1/2 cups mozzarella cheese, shredded
1/2 cup black olives, chopped
1/2 green onions, finely chopped
1/2 artichoke hearts or pickled peppers, finely chopped
jalapeno peppers, optional
1 tablespoon fresh oregano (1 teaspoon if using dried)
1 1/2 teaspoons fresh basil (1/2 teaspoon if using dried)
3 to 4 tomatoes, thinly sliced
salt and pepper, to taste

Directions: Generously butter a 9x13-inch baking pan. Preheat oven to 450°. Put grated zucchini in a colander and press out as much excess liquid as possible. Put zucchini in a mixing bowl. Add well-beaten eggs, flour and salt. Mix well and spread in buttered pan. Bake in a 450° oven for 8 minutes. Remove pan and reduce oven temperature to 350°. Cover the zucchini base with cheese. Combine ripe olives, onion, and chopped pickled peppers. Spread over cheese. Arrange jalapeno pepper rings over top. Sprinkle with fresh or dried herbs. Arrange tomatoes on top. Sprinkle with salt and pepper. Bake at 350°, uncovered, for 25 minutes.

Monday, July 20, 2009

Leftover CSA Produce?

I'm sure there are some of you out there that, like me, can't always keep up with the produce items that you receive every week in your shares. From my own experience, the most common leftovers in the fridge by the end of the week are greens and cabbage. I am sharing with you some very easy recipes that I have come up with that will hopefully both taste great and help empty out your fridge before tomorrow's veggies arrive. The cabbage soup, a variation of a soup that my mom would always make for my family, can use up to a half a head of cabbage at a time and requires almost no effort past chopping a bunch of vegetables (and has almost no calories!). The other two recipes can use collards, kale, chard, or any hearty green you have lying around. I often add extra veggies, or change up the herbs and spices I put in when I get bored. Have some fun, and happy cooking!


Quick and Easy Cabbage Soup

3 cups vegetable broth
2 cloves garlic, minced
2 15-oz. cans of pre-seasoned diced tomatoes (Italian or Mexican)
½ - 1 head cabbage, coarsely chopped
1 medium onion, chopped
1 cup carrot, chopped
½ cup zucchini, chopped (optional)
Basil and oregano, to taste
Salt and pepper, to taste

Directions: Add all ingredients to a large dutch oven or soup pot. Bring to a boil, cover, and simmer on low heat until all ingredients are cooked thoroughly and cabbage is transparent. Season to taste. For a spicier soup, add some diced chilies or jalapeno salt.

Sautéed Collard Greens and Cabbage

3 tablespoons extra virgin olive oil
1 medium onion, sliced
2 tsp crushed chili flakes, optional
2 cloves garlic, minced
¼ - ½ a head of cabbage (depending on the size of the head), sliced
1 bunch (about ½ a pound) of collard greens, center stem removed, sliced
Salt and pepper, to taste
1 tablespoon lemon juice, optional

Directions: Heat the olive oil over medium heat in a large skillet or wok. Add the sliced onion and crushed chili flakes if using, and sauté for a few minutes until they begin to soften and lose color. Add the minced garlic, salt and pepper, and continue to sauté until the garlic becomes fragrant. Stir frequently so the garlic does not burn. Once the onions are translucent and the garlic fragrant, add the sliced cabbage and greens. Frequently toss with tongs to coat cabbage and greens in oil, and to thoroughly cook all ingredients. The greens will first turn a fluorescent green, and then become steadily darker as they cook. Add more salt and pepper to taste. The dish is complete when cabbage is transparent, collard greens are a dark green color, and both are fully wilted. If using, add lemon juice right before removing from pan and serving – if added too early on, it can make the greens lose their vibrant green color.

Sautéed Greens and Mushrooms with Balsamic Vinegar

2 tablespoons extra virgin olive oil
1 red onion, thinly sliced
2 cloves garlic, crushed and finely chopped
2 portabella mushroom caps, cleaned* and cut into ¼ inch slices, OR 1 cup button mushrooms, cleaned* and sliced
½ tablespoon chopped rosemary
1 tsp cayenne pepper
1 bunch (approx. ½ a pound) of collard greens, kale, chard, or any other dark leafy green that holds up well to cooking and heat (not spinach), thick center stem removed, sliced or coarsely chopped
2 tsp sea salt
Pepper, to taste
¼ cup balsamic vinegar or Marsala cooking wine

Directions: Heat the oil in a large skillet over medium heat. Add the sliced onion, and cook for a few minutes until they begin to soften and lose color. Add the garlic and cook about a minute more, until fragrant. Add the mushrooms, rosemary and cayenne pepper. Continue cooking until mushrooms are tender, stirring frequently. De-glaze the skillet with the balsamic vinegar or Marsala wine, and cook about a minute more. Add the greens, sea salt** and pepper to taste. Toss the greens frequently to cook thoroughly. The dish is done when the greens are fully wilted and darker in color.

*To clean mushrooms, do not rinse in water. Take a dry, clean paper towel and gently rub any remaining dirt off of the caps and stems.

**As a general rule, do not add salt to mushrooms until they are almost fully cooked, as salt will promote dryness and much faster cooking when added to raw mushrooms.

Friday, July 17, 2009

Stuffed Patty Pan Squash Recipe

Patty Pan Squash

Summer squash varieties are versatile vegetables that make excellent side or main dishes in any meal. Patty pan squash, though it may seem dauntingly unusual in appearance, is no exception and can be treated like any other squash. Because of its mild flavor and diverse cooking options, squash can truly help you discover your inner gourmet chef!

For storage, keep all squash in a sealed plastic bag in the refrigerator – most squash will last this way for at least a week or more. When cleaning, rinse the squash in cool water and gently scrub excess dirt off of its skin. Like the potato, many of the squash’s best nutrients are in its skin, so don’t peel! The skin is full of the essential nutrient beta-carotene, while the inner squash is not (although patty pan squash as a whole contains magnesium, niacin, and vitamins A and C).

Most squash can be used interchangeably in recipes, so don’t hesitate to substitute patty pans into your favorite squash recipes. Squash is excellent served raw as crudités or grated or sliced on salads, steamed, baked or roasted, sautéed or fried in oil, grilled, marinated or on kebabs with other vegetables. You can add it to any stir fry, steamed with rice, or diced into soups.

Most herbs and flavors can be paired with squash. Enjoy it with garlic, basil, lemon, dill, or even some chili flakes. Squash also marinates well, so next time you’re grilling or roasting some veggies, throw it in to your favorite marinade for a few hours and you’re good to go.

Patty pan squash is so beautiful and unique in its whole form that it’s almost a shame to cut it into pieces - stuffing it maintains its natural glamor while still allowing for creativity and loads of flavor. Follow the links below to the CSA recipe blog for stuffed patty pan squash and other recipes - but remember to be creative! Experiment with whatever flavors and ingredients you enjoy, and you won’t be disappointed.

Stuffed Patty Pan Squash

6-8 patty pan squash
2 tablespoons extra virgin olive oil
2 cloves garlic, minced
½ cup onion, finely diced
1 ½ cups soft bread crumbs
Parmesan cheese, grated, to taste (optional
Salt and pepper, to taste

Directions: Preheat the oven to 350° F. To cook squash: Bring an inch of water to boil in a saucepan, add the squash and cover. Cook until stems are tender, about 10 minutes. Remove from water, slice the tops off of the squash, and slice a little off the bottom so the squash can stand up straight on its own. Remove the pulp of the squash with a melon-baller or small spoon and set aside.

To make stuffing: Heat the olive oil in a skillet and add the diced onion. Sauté 5-7 minutes, until soft and translucent. Add the garlic and sauté about a minute more, until fragrant. Add the squash pulp, cooking for another minute or two. Take the skillet off the heat and add the bread crumbs, stirring thoroughly. Add the parmesan cheese, salt, and pepper to taste.

Stuffing the squash: Spoon the mixture into each hollowed squash, filling until overflowing. Cover loosely with aluminum foil, and place stuffed squash in the preheated oven for about 15 minutes, or until everything is heated through. Place the tops of the squash back on top of the stuffing and serve.

Enjoy!!!

Wednesday, June 17, 2009

Garlic Scapes! (or tails, tops, what have you)

Garlic Scapes, or however else you call them, are the tops of the garlic plant, which need to be cut to promote bulb growth mid-season. Many people are unfamiliar with this delicious and fresh, milder form of garlic, but they happen to be perhaps my favorite vegetable and I hope people enjoy experimenting with them in this weeks' CSA share. They are incredibly tender after only a few minutes of cooking, and pack all the nutrients found in garlic. So here are some scape tips:
In a salad:
Chop them up and throw them in a salad, they'll add a garlicky punch that is really nice for garlic fans-it isn't as strong as real garlic, so don't worry. I haven't done this, but something tells me they would be great in a salad niçoise.

Sauteed:
Cut off the tough ends and tops of the flower tips of your scapes and sautee in butter or olive oil; I've done this with a tablespoon or two of brown or white sugar (caramalize the sugar briefly in the oil, then add the scapes) or with soy sauce- or both- with excellent results. Scapes only need a few minutes of cooking.

Thai Coconut Curry with Garlic Scapes:
Lots of people have a recipe for something like this, and the garlic scapes would work just as well in a stir-fry. Treat the scapes like scallions and chop them up and throw them in with the onion. I made a coconut curry with some friends last night which had coconut milk, lemon grass, ginger, garlic scapes, onion, purple cabbage, carrot, chilis, green peppers and tofu. And yes, it was very good. Just remember to use an oil with a high heat point (peanut oil is good) so you can cook it fast and hot.

And last but not least: Pickled Garlic Scapes!
Yes, that is right, pickled garlic scapes! Exclamation points are necessary because these are just so good, and let you enjoy scapes all through the winter. Pickle them as you would to make dilly beans or pickles (but extra garlic is unnecessary).


photo credits: Patti Truant, Christiana Usenza

Friday, July 25, 2008

Zucchini, squash & broccoli with tomato crab meat sauce over whole wheat penne pasta

Here's something I made last night after getting home at 9pm (not from work, don't worry, but from tennis). It was late, we were hungry and I wanted something light and quick. So here it is. It'll probably take me longer to post this than it took me to make this dish, but then, I'm a slow typist and I do have a way with the chef knife.

While the salted water for pasta gets to a boil, heat up some vegetable oil in a pan over medium heat. Add chopped onion, garlic and hot red pepper flakes , cook until the garlic starts to become fragrant or to color a bit then add the chopped veggies. If you're not ready with the veggies, add some white wine, to cool down the cooking process a bit. The veggies do not need much cooking (as they are perfectly good raw), so 5 minutes after adding the veggies, add the chopped tomato and the crab meat (you don't need a lot, though the more the better) and turn off the heat. Sprinkle herbs on top of the veggies and in the cooked pasta and serve hot.


The best thing about this dish is that it can be done really quickly and is really versatile. In the winter I make a white wine cream sauce , and I usually add whatever veggies I have in the fridge. Crab meat is pricey and hard to come by, but one can easily use shrimp or fish or mushrooms. The leftovers are great too (even cold, as I had today for lunch). I omitted any quantities from this recipe because I really like the freedom to add as much of something as I like or have, and as I need. Enjoy!

Thursday, July 24, 2008

this week's share

what a diverse bounty!! i told you the greens would eventually be replaced with the brilliant colors of summer. although i must admit i do miss them sometimes! so last night i managed to use the onions, anaheim peppers (my addition to the recipe), potatoes and corn in one recipe!! it's from gourmet magazine and was quite tasty! if you aren't feeding a lot i suggest freezing half of it for later. http://www.epicurious.com/recipes/food/views/POTATO-CORN-CHOWDER-242862

there is also another recipe that we are going to try tonight with the eggplant. i'll let you know how it goes. marinated eggplant with capers and mint. it calls for japanese or italian eggplant but i'm going with the regular ones that we got yesterday! http://www.epicurious.com/recipes/food/views/MARINATED-EGGPLANT-WITH-CAPERS-AND-MINT-242842

on a side note...does anyone know why the red leaf lettuce is no longer quite so red? i wonder if it has something to do with the heat or the later part of the season? when we first started getting it the leaves were deep red all the way down and now there's barely a red tinge on the tips. just curious.

Thursday, July 10, 2008

Greens and cheese quiche

This is a sort of ad hoc recipe, but I made it, tasted it, and proclaim it good enough to share. A result of too many veggies last week, since I got most of the share due to the long weekend. It is a version of a spinach and cheese quiche, but uses assorted greens instead, and a "crust" of shredded red potatoes instead of time consuming dough making - I suppose you can make it in any pan, but I used an 8 inch nonstick pie pan.

Trim and steam any and all greens on hand. I used the Kale, Chard and beet greens of last week. Let cool, squeeze out the water, and chop coarsely.

Cook 4 slices of bacon or turkey bacon in a pan, and then saute 1/2 an onion and 1 tsp of chopped garlic in the same pan, to get that extra flavor.

Shred 4 small red potatoes, with the peel, into a bowl. Add a 1/2 tsp of salt, mix well, and then squeeze out the water with your hands. Season the shredded potatoes with whatever is on hand - I used some grill seasoning. Pat into the bottom of the pan, and bake at 400 for about 8 minutes.

Crumble bacon, and spread over the potato crust. Mix the greens with the onions, add 1/2 cup of shredded cheese (cheddar, parmesan, mozzarella...anything tasty), and spread on top of bacon. Beat 4 eggs, add a bit of pepper and more grill seasoning, and pour over the greens. Bake at 400 for 20-25 minutes, or until the quiche is set (doesn't jiggle when you shake the pan).

Enjoy, and share. :)