Showing posts with label garlic. Show all posts

Thursday, July 15, 2010

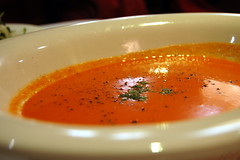
Yellow squash soup w/cinnamon & cloves

It not much of a recipe – mostly guesswork – but it came out pretty good:
    • Sautee garlic and onion w/butter, salt, cinnamon, rosemary in large pot or skillet
    • Add cubed squash, honey/brown sugar, cloves cook under a lid until tender
    • Add small amounts of water as needed
    • Remove cloves
    • Puree in blender

    Monday, November 2, 2009

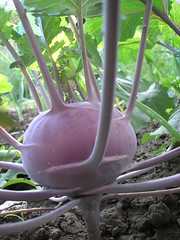
    Kohlrabi


    Kohlrabi is a relatively unknown vegetable in the Americas, so good and easy recipes can be hard to come by. Luckily, though, kohlrabi is a surprisingly versatile food to work with. You can substitute most dishes with broccoli, potatoes, or turnips with kohlrabi to change up some of your normal meals, or add it to soups or sautes. It sure is an odd thing to behold, but once you try kohlrabi for the first time, you'll be wanting more. The following recipes are ones that I've been able to try out in the short time I've had since discovering it. Feel free to respond with some of your favorite kohlrabi dishes - I am also looking for more to try!


    Easy Roasted Kohlrabi

    1-1 1/2 lbs. kohlrabi, skinned and diced
    a tablespoon or so of olive oil (enough to coat the kohlrabi)
    1-2 cloves of garlic, minced
    salt to taste
    good vinegar

    Directions: Preheat the oven to 450 degrees F. Toss the diced kohlrabi in the olive oil, adding the garlic and salt as you mix (feel free to add additional herbs and spices to your taste). Spread evenly on a baking sheet and roast in the oven for about 30 minutes, stirring every once in a while. Kohlrabi should be tender when poked with a fork. Sprinkle with a good vinegar right before serving.

    Kohlrabi Puree
    courtesy of http://www.foodiefarmgirl.blogspot.com

    4 kohlrabi bulbs with leaves
    2 tablespoons extra virgin olive oil
    1 large onion, chopped
    3 cloves garlic, minced
    4 ounces mushrooms, quartered
    3 tablespoons cream (or milk, water, stock, or olive oil - whatever you have on hand)
    salt and pepper, to taste

    Directions: Trim the kohlrabi bulbs, peeling them if the skins seem tough. Rinse the leaves (discarding any that are yellow) pat them dry, and coarsely chop. Set aside. But the bulbs into 1-inch chunks. Bring a saucepan of lightly salted water to a boil, and add the kohlrabi chunks. Reduce the heat and simmer until tender, about 15 minutes. Meanwhile, heat the olive oil in a skillet. Add the onion and sauté over medium-low heat until softened, about 5 minutes. Add the garlic and cook, stirring, another 1 to 2 minutes. Do not let garlic brown. Add the mushrooms and the reserved kohlrabi leaves to the skillet. Cover, and cook 5 minutes. Then uncover, and cook, stirring, until all the liquid has evaporated, 3 minutes. Set the skillet aside. Drain the kohlrabi chunks and place them in the bowl of a food processor. Add the mushroom mixture and all the remaining ingredients. Purée until smooth. Transfer the purée to a saucepan and reheat over low heat, stirring, 2 minutes.

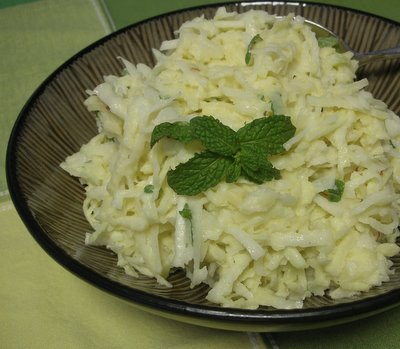
    Kohlrabi & Apple Slaw with Creamy Coleslaw Dressing

    adapted from A Veggie Venture blog

    1 pound kohlrabi, peeled and grated
    2 apples (or enough to equal the quantity of the kohlrabi), peeled and grated
    1/4 cup cream
    1 tablespoon fresh lemon juice
    1/2 tablespoon good mustard
    1/2 teaspoon sugar
    salt and pepper, to taste
    fresh mint, chopped
    about a handful of craisins

    Directions: whisk cream into light pillows, about a minute. Stir in all other ingredients, including the kohlrabi and apple. Serve immediately.

    Monday, October 19, 2009

    Bell Peppers

    Bell peppers are really fun vegetables to cook with, offering many tasty combinations and possibilities. Their color keeps beautifully when cooked, and their shape allows for some really creative and fun serving options. Below are some of my favorite bell pepper recipe. They are delicious and each use peppers in a completely different way. Happy cooking!

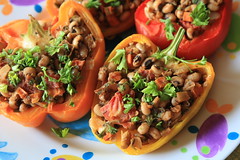
    Creole Stuffed Peppers
    courtesy of Veganomicon: The Ultimate Vegan Cookbook
    by Isa Chandra Moskowitz & Terry Hope Romero

    4 large bell peppers
    2 tablespoons olive oil
    1 medium yellow onion, finely chopped
    2 jalapeños, cut in half, seeded, and finely sliced
    1 cup carrots, finely diced
    4 cloves garlic, finely chopped
    2 dried bay leaves
    1 teaspoon dried oregano
    1 teaspoon dried basil
    2 teaspoons paprika
    3 sprigs fresh thyme (or 1 teaspoon dried)
    1 teaspoon salt
    1 15-oz. can diced tomatoes
    2 15-oz. cans black-eyed peas, drained and rinsed
    1/4 cup chopped fresh parsley (or 1 teaspoon dried)

    Directions: Preheat the oven to 350 degrees F and grease a 9x13-inch casserole dish with a little olive oil. Bring a large pot of water to a boil.

    Cut the peppers in half lengthwise through the stem end. For aesthetic purposes, try to leave the stem intact on one side; if you can't manage it, no love lost. Remove the seeds and membranes. Submerge the peppers in the boiling water and cover. Let them boil for 5 minutes, then drain them immediately and rinse with cold water to cool them down a bit.

    Meanwhile, heat the oil in a large skillet over medium-high heat. Saute the onions, jalapeños, and carrots for about 10 minutes. You want the veggies to brown, especially the carrots. If it looks like they are steaming rather than browning, then raise the heat a bit. Add the garlic about 5 minutes into the cooking process.

    Add the bay leaves, the other herbs and spices, and the salt; saute for 1 more minute. Add the tomatoes and peas, stir and cover, and cook for 10 minutes. If it seems too liquidy then remove the cover and cook long enough to reduce some of the liquid. Mix in the parsley.

    Remove the bay leaves and thyme sprigs. The mixture will be hot, so we find it's easier to just remove the herbs while filling the peppers; just be on the lookout for them.

    Spoon a little less than 1/2 cup of the veggie mixture into each pepper half. Again, the filling will be hot, so be careful while you are handling it. Place the pepper halves in the casserole dish and bake for about 25 minutes.

    Lemon-Garlic Chick Pea Dip with Bell Peppers
    courtesy of Rachael Ray

    1 15-oz. can chick peas, drained
    1 clove garlic, cracked from its skin
    1 lemon, zested and juiced
    4 to 5 sprigs fresh thyme leaves, stripped from stems
    coarse salt and pepper
    a few drops hot sauce, to taste
    1/4 or so of olive oil

    Directions: combine all ingredients except olive oil into a food processor. While processing, stream in olive oil. Transfer to a dish, and serve with slices of raw bell pepper (and any other veggies you have on hand)!

    Homemade Bell Pepper Pasta Sauce

    2-3 tablespoons olive oil
    1 medium onion, finely chopped
    2-3 bell peppers of assorted colors, diced
    4 cloves garlic, minced
    2 cans diced tomatoes with Italian seasoning, coarsely pureed by hand (just mash with a fork)
    2 tablespoons tomato paste
    salt and pepper, to taste
    crushed red pepper flakes, to taste
    1/2 teaspoon sugar
    fresh or dried basil, tarragon, parsley

    Directions: Heat olive oil in a medium-sized saucepan. Add diced onion and saute until translucent, 5-7 minutes. Add the garlic, cooking until the garlic is fragrant, about another minute. While this is cooking, take the mashed diced tomatoes and add to it the tomato paste, herbs, pepper flakes, sugar, salt, and pepper. Pour this mixture into the onions, and simmer over medium heat for about 20 minutes, stirring occasionally. Add the diced bell peppers, and continue to cook until the peppers are tender. Serve over pasta of your choice.

    Monday, October 12, 2009

    Winter Squash

    The following recipes were submitted by one of our CSA members, Allison Hauspurg. Winter squash are an especially versatile vegetable, and these recipes include more delicious fall and winter foods as well. Enjoy!

    Apple Stuffed Squash

    Preheat oven to 350. Slice the top off of your acorn squash, and scoop out all the strings & seeds (save the seeds!). Pour about 1/2 an inch of water into a casserole or pie dish or what-have-you, and place your squash top-down in the middle. Allow the squash to steam in the oven for 10-15 minutes. In the meantime, slice up 1/2 of a Gala apple (or other crunchy-sweet variety)–make sure to cut it into small, thin, slices (think overgrown confetti). Toss with some maple syrup, cinnamon, nutmeg, and a spoonful of Earth Balance or canola oil. Carefully remove the squash from the oven, and use a spoon to pack all your filling into the center. Place on a parchment-paper lined baking sheet and bake another 30-45 minutes (until it smells so good you can’t stand it).

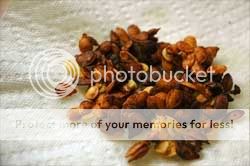
    Roasted Squash Seeds

    Preheat oven to 350 or so. Wash your squash seeds (I used acorn squash, see previous recipe) really really well until there’s no pulp left. Pat them dry and place them in a small bowl. Drizzle with olive oil and toss until they’re all covered. Spread them out on a baking sheet (or on a piece of parchment paper on a baking sheet) and sprinkle with sea salt. Bake for 10-15 minutes, stirring one or twice, until they’re all nice and brown looking. I’m not sure how to store them, because they never last that long!


    This last recipe is a favorite of mine from Food Network, and takes advantage of your butternut squash and your swiss chard at the same time in one delicious meal.

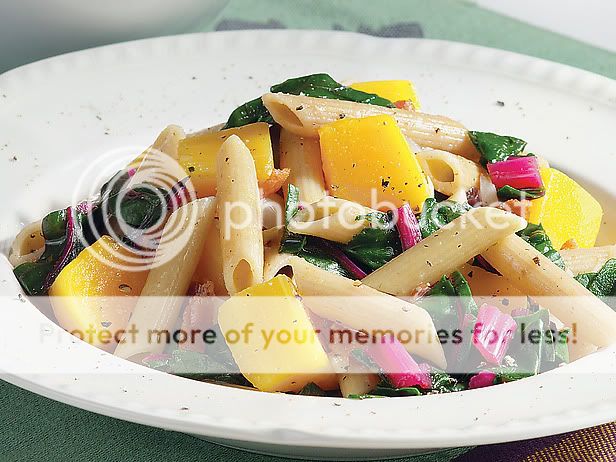
    Penne with Braised Squash and Greens

    2 teaspoons extra virgin olive oil
    4 ounces cubed tofu
    1 medium onion, chopped
    3 cloves garlic, minced
    crushed red pepper, to taste
    1 1/2 cups vegetable broth
    1 lb. butternut squash, peeled and cut into 3/4-inch cubes
    1 bunch Swiss chard, stems removed and leaves cut into 1-inch pieces
    8 ounces whole wheat penne, rigatoni, or fusili
    1/2 parmesan cheese, grated
    salt and pepper, to taste

    Directions: Put a large pot of water on to boil for cooking pasta. Heat oil in a large nonstick skillet over medium heat. Add tofu and cook, stirring, until lightly browned, 3 to 5 minutes. Transfer to a plate. Add onion to the pan; cook, stirring often, until softened and golden, 2 to 3 minutes. Add garlic and crushed red pepper; cook, stirring, for 30 seconds. Return the tofu to the pan and add broth and squash; bring to a simmer. Cover and cook for 10 minutes. Add chard and stir to immerse. Cover and cook until the squash and chard are tender, about 5 minutes. Meanwhile, cook pasta until just tender, 8 to 10 minutes or according to package directions. Drain and return to the pot. Add the squash mixture, Parmesan, salt and pepper; toss to coat.

    Monday, September 21, 2009

    Eggplant


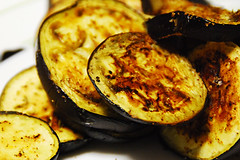
    Eggplant is one of the heartiest vegetables out there, and makes Meatless Monday that much easier every week since it's so easy to make into a filling, satisfying main course. The first thing most people think of when they have eggplant on the brain is, of course, Eggplant Parmesan. I'm sure that many of you already have your favorite Eggplant Parm recipe, so I won't add my own today. Instead, I have a few recipes that try to veer away from frying and sauteing. Eggplants soak up much more fat than other vegetables when cooking in the aforementioned ways, so if you're trying to eat on the healthier side you should stick to baking, broiling, or grilling it. Believe me, I love fried food as much as the next person, and these other options are equally delicious and easy to make - you won't be disappointed.

    Roasted Eggplant with Basil and Lemon

    1 large eggplant
    3-4 tablespoons extra virgin olive oil
    3 cloves garlic, minced
    2 tablespoons dried basil, thyme, and/or Italian seasoning
    salt and pepper, to taste
    2 tablespoons lemon juice

    Directions: Cut the eggplant lengthwise into slices about 1/2 inch thick. Place slices on a paper towel and salt each one. Let sit for 30 minutes to drain excess moisture, then pat with paper towels. Preheat the oven to 400 degrees F. Lightly grease a baking sheet or shallow roasting pan. Add the garlic, herbs, salt, and pepper to the oil and mix thoroughly. Then, brush each eggplant with the oil and herb mixture. Roast in the oven for 25 to 30 minutes, until soft and golden brown. Remove from the oven, sprinkle with lemon juice, and serve.

    Honey Glazed Roasted Vegetables
    courtesy of eggplantrecipes.net

    1/4 cup honey
    1/4 cup extra virgin olive oil
    3 tablespoons balsamic vinegar
    1 clove garlic, crushed
    salt, pepper, dried thyme, to taste
    4-6 cups mixed halved red potatoes, sliced zucchini, thickly sliced onions, red peppers, carrots, sweet potatoes, sliced eggplant (any vegetables you have on hand, really)

    Directions: Preheat oven to 400 degrees F. Combine honey, olive oil, balsamic vinegar, garlic, thyme, salt, and pepper in a small bowl and mix well. Arrange the cut vegetables in a roasting pan and brush the honey mixture over the vegetables, incorporating well. Bake for 30 minutes, stirring occasion
    ally.

    Eggplant "Steaks"
    courtesy of Alton Brown, FoodNetwork.com

    1/4 cup teriyaki sauce
    1/4 cup thick steak sauce

    1/2 cup extra virgin olive oil
    2 tablespoons honey

    2 tablespoons apple cider vinegar
    salt and pepper, to taste
    8 (1/2 inch) eggplant slices, purged with salt (see first recipe for directions)
    1 cup Parmesan cheese, grated
    3 tablespoons fresh parsley, optional

    Directions: In a small bowl whisk together the teriyaki sauce, steak sauce, olive oil, honey, and apple cider vinegar. Season with salt and pepper. Pat your eggplant dry with paper towels. With a pastry brush apply the sauce to both sides of the eggplant. Place eggplant rounds onto a sheet tray fitted with a rack. Place the tray under the broiler for until eggplant is nicely browned, approximately 2 minutes. Turn slices over and place back under broiler to brown the other side. Generously sprinkle freshly grated Parmesan over all of the slices. Place back under the broiler for 1 minute to nicely brown the cheese. Serve plain or sprinkle with freshly chopped herbs. (Not everyone has a tray with a fitted rack and/or a broiler option in their oven, so feel free to grill the eggplant slices instead of the above option. )

    Monday, September 14, 2009

    Basil


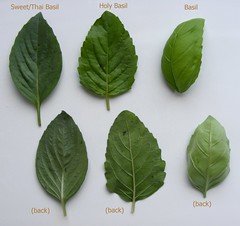
    Basil is an especially versatile herb. Whereas most herbs and spices remain in the background to add complexity and additional flavor (which is a very important job to have, don't get me wrong), basil can often take center stage in many dishes. It complements a large variety of other flavors, vegetables, and fruits, and can be used in sauteed dishes, soups, sauces, eaten raw, or even used in desserts. I highly suggest buying a living basil plant the next time you're at your local farmers market. Mine is simply in a small pot on my windowsill, no outdoor plot of land or any real effort required. It is such a beautiful and aromatic plant, and what's even better is that now you'll have fresh homegrown basil at your disposal every time you're cooking a meal.


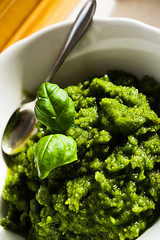
    Basil Pesto

    About 2 cups fresh basil, packed
    2 cloves garlic, roughly chopped
    1/4 pine nuts (or walnuts if you prefer or have them on hand)
    2/3 cup extra virgin olive oil
    Salt and pepper, to taste
    1/2 Pecorino cheese, grated

    Directions: Toast the pine nuts or walnuts in a small frying pan - you'll know that they're done when they are lightly browned and very fragrant. Combine the nuts, basil, and garlic in a food processor and pulse until everything is coarsely chopped. Slowly add the oil as you continue to process, until fully incorporated and smooth. Add the salt and pepper. Add the rest of the oil and pulse, again until smooth and fully incorporated
    . Remove from food processor and place into a serving bowl with the Pecorino cheese, and mix until that is also fully incorporated.


    Stir-Fried Asparagus and Basil with Spicy Orange Sauce
    courtesty of Jack Bishop's 'Vegetables Every Day'

    1/3 cup orange juice
    1 1/2 tablespoons soy sauce
    Crushed red pepper flakes, to taste
    1 1/2 pounds asparagus
    4 teaspoons peanut oil
    2 cloves garlic, minced
    1 tablespoon fresh minced ginger, or about 1 teaspoon powdered ginger
    1/2 fresh basil leaves, packed

    Directions: Combine the orange juice, soy sauce, and crushed red pepper flakes in a small bowl and set aside. Snap off the tough ends of the asparagus. If the asparagus are thin, cut them on the diagonal into 2-inch pieces. If the asparagus are average or thicker, cut the spears in half lengthwise and then on the diagonal in 2-inch pieces.

    Heat 1 tablespoon of the oil in a large nonstick skillet set over high heat. When the oil is shimmering but not smoking, add the asparagus and stir-fry for 2 minutes. Push the asparagus to the sides of the pan and place the garlic and ginger in the center. Drizzle the remaining 1 teaspoon oil over the garlic and ginger. Cook until fragrant, about 20 seconds. Add the orange juice mixture, toss to coat well, and cover. Cook until the asparagus are tender, 2 to 3 minutes, depending on the thickness of the spears. Remove the cover and add the basil. Stir-fry until the sauce has reduced to a thick glaze, about 30 seconds. Serve immediately.


    And if you're really adventurous and love making desserts, try this basil creme brulee! It is my absolute favorite dessert, and the basil adds a really earthy and sweet flavor that really puts this dessert over the top.

    Lemon Basil Creme Brulee
    courtesy of Ristorante Terrazza

    4 cups heavy whipping cream
    1 lemon, peeled
    4 basil leaves
    8 egg yolks
    1 cup sugar
    A pinch of salt
    1 cup granulated sugar for caramelizing

    Directions: Place the cream, lemon peel and basil in a heavy saucepan at medium temperature. Meanwhile whisk together the yolks, sugar and salt in a large bowl. When the cream is hot, slowly whisk in about 1 to 2 cups of the hot cream into yolks to temper it (i.e. bring it to the same temperature). Whisk in the remaining cream and strain through a fine mesh sieve. Divide the custard among 6 to 8 oz. ramekins. Set the ramekins in a shallow roasting pan and fill with enough hot water to reach halfway up the sides of ramekins. Carefully set pan in the oven and bake for about an hour at 300 degrees f. To test doneness of the custards, gently shake one. If it moves in one mass, they are done. Refrigerate until cold. Divide the remaining cup of sugar equally among the tops of the ramekins, and melt the sugar until crispy and slightly browned with a torch. Allow to cool for about 5 minutes, and serve.

    Monday, August 31, 2009

    Swiss Chard


    Swiss chard, although readily available at farmers markets and grocery stores, is often avoided or overlooked by many people. And I will admit, it is very...different looking than most other leafy greens. Once I conquered my own reservations, I learned to love and appreciate this unique green and quickly made it one of my staple foods. Swiss chard is just as versatile as any other green such as kale, spinach, and collard greens, and can be used interchangeably with them in any recipe. Chard, however, has a more peppery, buttery, earthy flavor than these other greens, so it is important not to over-flavor them while cooking so you don't miss out on the flavors it naturally has. Below are some of my favorite recipes, but as always, you can never go wrong with some of your own experimenting. Happy cooking!


    Simple Swiss Chard Saute

    1 bunch swiss chard, chopped
    2-3 tablespoons extra virgin olive oil
    2 cloves garlic, minced
    salt and pepper, to taste
    dried crushed red pepper or cayenne pepper to add heat (optional)
    1 tablespoon soy sauce

    Directions: heat olive oil in large skillet. If using chopped chard stems, add them to oil and saute for about 5 minutes. Add the chard greens, garlic, salt and pepper, and dried red pepper and continue to saute until the greens begin to wilt. Add soy sauce once the chard has wilted.


    Whole Wheat Spaghetti with Swiss Chard and Pecorino Cheese
    courtesy of Giada De Laurentiis, FoodNetwork.com

    1 tablespoon extra virgin olive oil
    2 lbs. swiss chard, trimmed and chopped
    3 cloves garlic, minced
    1 15-0z. can diced tomatoes with juices
    1/4 cup white cooking wine
    1/4 teaspoon dried crushed red pepper flakes
    salt and pepper, to taste
    8 oz. whole wheat spaghetti
    1/4 cup pitted kalamata olives, coarsely chopped
    2 tablespoon Pecorino cheese, grated
    2 tablespoons pine nuts, toasted

    Directions: Heat the oil in a heavy large frying pan over medium heat. Add the onions and saute until tender, about 8 minutes. Add the chard and saute until it wilts, about 2 minutes. Add the garlic and saute until fragrant, about 1 minute. Stir in the tomatoes with their juices, wine, and red pepper flakes. Bring to a simmer. Cover and simmer until the tomatoes begin to break down and the chard is very tender, stirring occasionally, about 5 minutes. Season the chard mixture, to taste, with salt and pepper. Meanwhile, bring a large pot of salted water to a boil. Add the spaghetti and cook until tender but still firm to the bite, stirring frequently, about 8 to 10 minutes. Drain the spaghetti. Add the spaghetti to the chard mixture and toss to combine. Transfer the pasta to serving bowls. Sprinkle the olives, cheese, and pine nuts and serve.
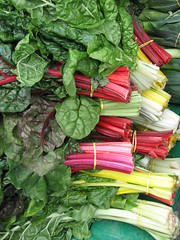
    the many colors of Swiss chard


    This final recipe is a little more time consuming, but is absolutely delicious and is a very different and refreshing way of serving and eating leafy greens. If you have some extra time, give it a try!

    White Pizza with Indian Spiced Greens
    courtesy of Sharon Sperber, FoodNetwork.com

    1-2 tablespoon vegetable oil
    3 cloves garlic, thinly sliced
    1 large bunch Swiss Chard, stems removed
    1 bunch mustard or any other greens, coarsely chopped
    1-2 teaspoons curry powder
    1 16-oz. container store-bought pizza dough (or make your own!)
    olive oil, for grill
    8 oz. fresh mozzarella, shredded
    3/4 cup shredded fontina cheese
    1/2 cup goat cheese, crumbled
    1/2 cup crumbled paneer

    Directions: Preheat the grill to 400 degrees F. Heat the pan over medium-high heat and add the oil. Saute the garlic for 1 minute. Add in the greens and saute until wilted. Add in the curry powder and continue to cook the greens until they start to get soft. Remove from heat and set aside.

    Cut the dough into 2 (8-ounce) pieces. Stretch the dough out on a lightly floured surface with your hands. When the grill is at a consistent 400 to 450 degrees F (no hotter than 450), lightly brush the grill with olive oil. Place dough directly onto the grill surface. Close the grill cover and cook for 4 to 5 minutes. About 2 minutes in, open the grill and pop the air bubbles with a fork. The bottom should be brown with some charred spots but not burned or underdone. Close lid and continue cooking. Remove from grill and place on a work surface with the cooked/grilled side up. Lower the heat on the grill to medium-low heat so that the cheese has time to melt and the bottom does not burn.

    Spread equal amounts of the mozzarella and fontina on each pizza. Divide the cooked greens on top of the cheese. Place a few dollops of crumbled goat cheese over the top of the greens, then sprinkle with the crumbled paneer.

    Lightly oil grill once more and carefully place pizzas, cheese side up, onto the grill. Close the lid and let it cook slowly for another 5 to 10 minutes to allow the cheese to melt and so that the bottom does not burn. When the cheese is completely melted and the bottom is a nice even brown with some charred spots, remove from the grill to a cutting board, slice and serve.

    Monday, August 17, 2009

    It's Tomato Time!


    Nothing excites me more than tomato season, and all of the delicious possibilities this time of year implies. Whether they are cherry, grape, roma, heirloom, or any other type of tomato, there are thousands of simple, elegant, and mouth-watering recipes available to you. I normally turn right to the Food Network during my recipe hunt, and lucky for us their current in-season feature this week is none other but the tomato! Below are some of my personal favorites that have both tomatoes and other in-season vegetables for you to enjoy.

    Ratatouille
    courtesy of Julia Child, in 'The Way to Cook'

    1 lb. fresh shiny firm eggplant
    salt, as needed
    1 lb. zucchini
    1/4-1/3 cup olive oil, as needed
    Thyme, oregano, or a bottled herb blend
    1 lb. onions (about 3 1/2 cups sliced)
    2-3 large green bell peppers
    3 large cloves garlic, minced
    3 cups tomato pulp (fresh tomatoes peeled, seeded, juiced)

    Directions: Cut the eggplant into crosswise slices 3/8 inch thick. Salt lightly on each side and spread on paper towels. Cut zucchini lengthwise into 2-inch slices 3/8 inch thick. Salt the zucchini. Let both vegetables stand 20 minutes; pat dry in paper towels.
    - Baking the eggplant: Preheat the oven to 400 degrees Fahrenheit. Arrange the eggplant on a cookie tray, paint lightly with oil, and sprinkle with herbs. Cover with aluminum foil and bake 15-20 minutes, until just tender.
    -The rest of the vegetables: preheat olive oil in large skillet. Lightly brown zucchini on both sides; remove to paper towels. Add more oil if necessary, and saute the onions until tender but not browned. Stir in the peppers and garlic; fold and toss over moderately high heat for several minutes, until fairly tender. Set aside 1/2 cup of the tomatoes, and fold the rest into the onions and peppers; toss, adding salt and herbs to taste, until the tomatoes have rendered their juice; continue for several minutes until the juices have almost boiled off.
    -Finishing the ratatouille - about 30 minutes - Set aside best looking eggplant for the top. Arrange the vegetables in a casserole, starting and ending with the onion-pepper-tomato mixture. Arrange the reserved tomato and eggplant decoratively over the top. C
    over and bring to a simmer over moderate heat, either on top of the stove or in a 325 degree Fahrenheit oven. When bubbling gently, uncover, tip the casserole, and baste with the juices rendered; repeat several times until the juices have almost evaporated. Serve hot, warm, or cold.

    (this may look like a lot of steps, but it is very easy and definitely worth the effort!)

    Homemade Tomato Soup
    courtesy of Michael Chiarello

    1 lb. fresh tomatoes, chopped
    3/4 cup extra virgin olive oil
    Salt and pepper, to taste
    1 stalk celery, diced
    1 carrot, diced
    1 onion, diced
    2 cloves garlic, minced
    1 cup vegetable broth
    1 bay leaf
    2 tablespoons butter
    1/4 cup fresh basil leaves, chopped
    1/2 cup heavy cream, optional

    Directions: Preheat oven to 450 degrees F. Strain the chopped tomatoes, reserving the juices, and spread onto a baking sheet, season with salt and pepper, to taste, drizzle with 1/4 cup of the olive oil and roast until caramelized, about 15 minutes. Meanwhile, in a saucepan, heat remaining olive oil over medium-low heat. Add the celery, carrot, onion and garlic, cook until softened, about 10 minutes. Add the roasted chopped tomatoes, reserved tomato juices, vegetable broth, bay leaf and butter. Simmer until vegetables are very tender, about 15 to 20 minutes. Add basil and cream, if using. Puree with a hand held immersion blender until smooth.

    Monday, August 10, 2009

    Sweet Potato Leaves


    This past week's CSA share brought with it my first culinary encounter with sweet potato leaves. I was a little bewildered at first, but soon learned of their versatility in many different types of dishes and ability to replace most other leafy greens in recipes. That being said, it is rather difficult to find sweet-potato-leaf-specific recipes anywhere. Since they are used mainly in Asian and Pacific Island cuisine, some people find it easiest to begin their search within those boundaries. The following recipes include a Filipino-style dish (courtesy of phillip-anna.blogspot.com) and one of my own that uses some traditional complementary flavors. The bottom line: as strange and daunting as the sweet potato leaf may be, it is surprisingly versatile and makes a great green for culinary exploration and experimentation. Enjoy!

    Kamote (Sweet Potato Green) Salad – a traditional Filipino dish
    Courtesy of phillip-anna.blogspot.com

    2 cups sweet potato leaves (no stems)
    Water for boiling
    ½ medium red onion, thinly sliced
    ½ cup tomatoes, sliced
    White vinegar, to taste
    Soy sauce, to taste
    Salt, to taste
    Cooked rice, optional

    Directions: Rinse and drain sweet potato leaves. Bring water to a boil with a pinch of salt, put in leaves until tender and cooked through. Drain sweet potato leaves and transfer them to a bowl. Add red onion, tomato, vinegar, and soy sauce to taste, and toss thoroughly. Enjoy on its own or over cooked rice.


    Simple Stir-Fried Sweet Potato Leaves

    One bunch of sweet potato leaves (soft stems are okay to use, too)
    1-2 tablespoons olive oil
    1-2 dried chilies, minced or 1 ½ tsp. chili powder
    2 cloves garlic, minced
    Soy sauce, to taste
    Salt and pepper, to taste

    Directions: Bring water to boil with salt, blanch the sweet potato leaves for about two minutes. Drain and rinse with cold water. Heat oil in skilled over medium heat. Sauté garlic and chilies (or chili powder) until garlic is fragrant, about a minute, stirring often. Chop the leaves and add them to the skillet. Stir-fry for about three minutes, until leaves are dark and tender. Add soy sauce, salt, and pepper to taste.

    Monday, August 3, 2009

    Summer Time means Summer Squash


    Well folks, we are in the peak of summer, and many of you have probably noticed that summer squash is also peaking as they pile up in your weekly CSA share or at your local farmers' market. It is easy to turn to the usual steamed or sauteed squash dish each night with dinner, but it can be equally easy to use them in a completely new and unique way with nearly the same ingredients and time. Because squash are so plentiful and popular in the US, a quick internet search of "summer squash recipes" will yield thousands of results. I personally use the Food Network site as my go-to recipe finder, but there are many other websites out there, and I highly suggest searching around for your own favorite. Here are a few squash and zucchini recipes that I love to get you started. Happy hunting!

    Summer Squash Soup with Basil
    courtesy of Food Network's Curtis Aikens
    fresh basil, julienned
    2 tablespoons olive oil
    1 1/4 pounds summer squash of any variety, roughly chopped
    1 large onion, chopped
    6 cups vegetable stock*
    1/2 cup basil, julienned
    1 1/2 tablespoons butter, softened
    1 1/2 tablespoons flour
    Salt and pepper, to taste
    Juice of 1 lemon
    Sour cream or plain yogurt, optional
    *I sometimes add a 1/2 cup or so of cream in place of that same amount of stock to help give it a thicker, creamier texture

    Directions: Heat the oil in a large saucepan or stockpot, add zucchini and onion. Saute for 5 minutes or until onions are translucent and zucchini is crisp tender. Then add stock, bring to a boil, reduce heat and partially cover and cook for 25 minutes. Add basil during the last 5 minutes of cooking. Mix the butter and flour together into a paste. Remove 1 cup of simmering stock and whisk in butter mixture until smooth. Add back into soup, stir until thickened. Remove soup from heat to a blender and puree until smooth. Taste and season with salt and pepper. Add lemon juice and serve with a dollop of sour cream or yogurt. Serve with toasted sourdough bread, if desired.

    Summer Squash Pancakes
    courtesy of About.com's Diana Rattray

    3 cups grated summer squash
    1/2 teaspoon salt
    1 tablespoon fresh chopped parsley
    1-2 cloves garlic, minced
    3/4 cup grated Parmesan cheese
    1 large egg
    1 cup biscuit mix
    Pepper, just a dash or to taste
    milk as needed

    Directions: Combine all ingredients in a mixing bowl. Add enough milk as necessary to make a thin pancake-like batter. Drop by spoonfuls onto hot oiled griddle or skillet. Turn over when bottom is golden and cook until browned on both sides. Serve with butter, sour cream, or any desired topping.

    Zucchini "Pizza"
    courtesy of About.com's Diana Rattray

    3 cups zucchini, grated
    3 eggs, well beaten
    1/2 cup flour
    salt, to taste
    2 1/2 cups mozzarella cheese, shredded
    1/2 cup black olives, chopped
    1/2 green onions, finely chopped
    1/2 artichoke hearts or pickled peppers, finely chopped
    jalapeno peppers, optional
    1 tablespoon fresh oregano (1 teaspoon if using dried)
    1 1/2 teaspoons fresh basil (1/2 teaspoon if using dried)
    3 to 4 tomatoes, thinly sliced
    salt and pepper, to taste

    Directions: Generously butter a 9x13-inch baking pan. Preheat oven to 450°. Put grated zucchini in a colander and press out as much excess liquid as possible. Put zucchini in a mixing bowl. Add well-beaten eggs, flour and salt. Mix well and spread in buttered pan. Bake in a 450° oven for 8 minutes. Remove pan and reduce oven temperature to 350°. Cover the zucchini base with cheese. Combine ripe olives, onion, and chopped pickled peppers. Spread over cheese. Arrange jalapeno pepper rings over top. Sprinkle with fresh or dried herbs. Arrange tomatoes on top. Sprinkle with salt and pepper. Bake at 350°, uncovered, for 25 minutes.

    Monday, July 20, 2009

    Leftover CSA Produce?

    I'm sure there are some of you out there that, like me, can't always keep up with the produce items that you receive every week in your shares. From my own experience, the most common leftovers in the fridge by the end of the week are greens and cabbage. I am sharing with you some very easy recipes that I have come up with that will hopefully both taste great and help empty out your fridge before tomorrow's veggies arrive. The cabbage soup, a variation of a soup that my mom would always make for my family, can use up to a half a head of cabbage at a time and requires almost no effort past chopping a bunch of vegetables (and has almost no calories!). The other two recipes can use collards, kale, chard, or any hearty green you have lying around. I often add extra veggies, or change up the herbs and spices I put in when I get bored. Have some fun, and happy cooking!


    Quick and Easy Cabbage Soup

    3 cups vegetable broth
    2 cloves garlic, minced
    2 15-oz. cans of pre-seasoned diced tomatoes (Italian or Mexican)
    ½ - 1 head cabbage, coarsely chopped
    1 medium onion, chopped
    1 cup carrot, chopped
    ½ cup zucchini, chopped (optional)
    Basil and oregano, to taste
    Salt and pepper, to taste

    Directions: Add all ingredients to a large dutch oven or soup pot. Bring to a boil, cover, and simmer on low heat until all ingredients are cooked thoroughly and cabbage is transparent. Season to taste. For a spicier soup, add some diced chilies or jalapeno salt.

    Sautéed Collard Greens and Cabbage

    3 tablespoons extra virgin olive oil
    1 medium onion, sliced
    2 tsp crushed chili flakes, optional
    2 cloves garlic, minced
    ¼ - ½ a head of cabbage (depending on the size of the head), sliced
    1 bunch (about ½ a pound) of collard greens, center stem removed, sliced
    Salt and pepper, to taste
    1 tablespoon lemon juice, optional

    Directions: Heat the olive oil over medium heat in a large skillet or wok. Add the sliced onion and crushed chili flakes if using, and sauté for a few minutes until they begin to soften and lose color. Add the minced garlic, salt and pepper, and continue to sauté until the garlic becomes fragrant. Stir frequently so the garlic does not burn. Once the onions are translucent and the garlic fragrant, add the sliced cabbage and greens. Frequently toss with tongs to coat cabbage and greens in oil, and to thoroughly cook all ingredients. The greens will first turn a fluorescent green, and then become steadily darker as they cook. Add more salt and pepper to taste. The dish is complete when cabbage is transparent, collard greens are a dark green color, and both are fully wilted. If using, add lemon juice right before removing from pan and serving – if added too early on, it can make the greens lose their vibrant green color.

    Sautéed Greens and Mushrooms with Balsamic Vinegar

    2 tablespoons extra virgin olive oil
    1 red onion, thinly sliced
    2 cloves garlic, crushed and finely chopped
    2 portabella mushroom caps, cleaned* and cut into ¼ inch slices, OR 1 cup button mushrooms, cleaned* and sliced
    ½ tablespoon chopped rosemary
    1 tsp cayenne pepper
    1 bunch (approx. ½ a pound) of collard greens, kale, chard, or any other dark leafy green that holds up well to cooking and heat (not spinach), thick center stem removed, sliced or coarsely chopped
    2 tsp sea salt
    Pepper, to taste
    ¼ cup balsamic vinegar or Marsala cooking wine

    Directions: Heat the oil in a large skillet over medium heat. Add the sliced onion, and cook for a few minutes until they begin to soften and lose color. Add the garlic and cook about a minute more, until fragrant. Add the mushrooms, rosemary and cayenne pepper. Continue cooking until mushrooms are tender, stirring frequently. De-glaze the skillet with the balsamic vinegar or Marsala wine, and cook about a minute more. Add the greens, sea salt** and pepper to taste. Toss the greens frequently to cook thoroughly. The dish is done when the greens are fully wilted and darker in color.

    *To clean mushrooms, do not rinse in water. Take a dry, clean paper towel and gently rub any remaining dirt off of the caps and stems.

    **As a general rule, do not add salt to mushrooms until they are almost fully cooked, as salt will promote dryness and much faster cooking when added to raw mushrooms.

    Friday, July 17, 2009

    Stuffed Patty Pan Squash Recipe

    Patty Pan Squash

    Summer squash varieties are versatile vegetables that make excellent side or main dishes in any meal. Patty pan squash, though it may seem dauntingly unusual in appearance, is no exception and can be treated like any other squash. Because of its mild flavor and diverse cooking options, squash can truly help you discover your inner gourmet chef!

    For storage, keep all squash in a sealed plastic bag in the refrigerator – most squash will last this way for at least a week or more. When cleaning, rinse the squash in cool water and gently scrub excess dirt off of its skin. Like the potato, many of the squash’s best nutrients are in its skin, so don’t peel! The skin is full of the essential nutrient beta-carotene, while the inner squash is not (although patty pan squash as a whole contains magnesium, niacin, and vitamins A and C).

    Most squash can be used interchangeably in recipes, so don’t hesitate to substitute patty pans into your favorite squash recipes. Squash is excellent served raw as crudités or grated or sliced on salads, steamed, baked or roasted, sautéed or fried in oil, grilled, marinated or on kebabs with other vegetables. You can add it to any stir fry, steamed with rice, or diced into soups.

    Most herbs and flavors can be paired with squash. Enjoy it with garlic, basil, lemon, dill, or even some chili flakes. Squash also marinates well, so next time you’re grilling or roasting some veggies, throw it in to your favorite marinade for a few hours and you’re good to go.

    Patty pan squash is so beautiful and unique in its whole form that it’s almost a shame to cut it into pieces - stuffing it maintains its natural glamor while still allowing for creativity and loads of flavor. Follow the links below to the CSA recipe blog for stuffed patty pan squash and other recipes - but remember to be creative! Experiment with whatever flavors and ingredients you enjoy, and you won’t be disappointed.

    Stuffed Patty Pan Squash

    6-8 patty pan squash
    2 tablespoons extra virgin olive oil
    2 cloves garlic, minced
    ½ cup onion, finely diced
    1 ½ cups soft bread crumbs
    Parmesan cheese, grated, to taste (optional
    Salt and pepper, to taste

    Directions: Preheat the oven to 350° F. To cook squash: Bring an inch of water to boil in a saucepan, add the squash and cover. Cook until stems are tender, about 10 minutes. Remove from water, slice the tops off of the squash, and slice a little off the bottom so the squash can stand up straight on its own. Remove the pulp of the squash with a melon-baller or small spoon and set aside.

    To make stuffing: Heat the olive oil in a skillet and add the diced onion. Sauté 5-7 minutes, until soft and translucent. Add the garlic and sauté about a minute more, until fragrant. Add the squash pulp, cooking for another minute or two. Take the skillet off the heat and add the bread crumbs, stirring thoroughly. Add the parmesan cheese, salt, and pepper to taste.

    Stuffing the squash: Spoon the mixture into each hollowed squash, filling until overflowing. Cover loosely with aluminum foil, and place stuffed squash in the preheated oven for about 15 minutes, or until everything is heated through. Place the tops of the squash back on top of the stuffing and serve.
    Enjoy!!!

    Wednesday, June 10, 2009

    Thai Lettuce Wraps

    The title of this recipe reveals an obvious departure in the use of entirely local ingredients. Fortunately (depending on one's standards), healthy and sustainable food needn't be entirely from within state lines. In fact, the type of food and how, where and when it is produced often have more bearing on health and environment than the distance it travelled to your plate.

    You may be wondering, if 'food miles' aren't a major issue, why sign up for a CSA? This is a broader topic that I'll address in subsequent blog entries, but safe to say there are substantial benefits of CSAs that go beyond mileage.

    Returning to the topic at hand - lettuce wraps - here's a crispy, high-protein treat that's perfect on a hot summer evening. Since I more or less threw this together on a whim, let's dispense with formal measurements:
    • Lettuce leaves (washed)
    • Peanuts
    • Peanut sauce (prepared or homemade)
    • Extra firm tofu
    • Brown rice (cooked)
    • Garlic, chopped
    • Chili pepper, chopped
    • Cilantro
    • Olive oil
    • Lime/lemon juice

    Tofu prep: Tofu, straight of the box, tends to be a bit watery. For a chewier texture, cut a package of tofu into cubes, apply light pressure (not so much that you mash it into soymilk) to drain off water, then place them in the freezer. When ready to use, thaw, apply pressure and drain additional water.

    Sautee the garlic and chili in olive oil. Add peanuts, tofu and peanut sauce. Cook until tofu is browned.

    Remove spines from lettuce (the crunchy parts don't wrap very well). Wrap tofu mixture, cilantro, brown rice and a dash of lemon. Dip in peanut sauce.

    When wraps inevitably fall apart, resort to fork.

    Friday, September 12, 2008

    got tomatoes?

    does everyone remember Julia's dear friend Jacques? my husband has been reading his biography and found this wonderfully simple recipe for primavera pasta. now you are probably conjuring up the same images i did when i heard that dish's name.....a sloppy mix of broccoli, squash, carrots and whatever else was left in the crisper drawer of the refrigerator with a heavy tomato sauce. well my friends this recipe couldn't be farther from the plate. with all of the heirlooms coming from the farm you'll definitely want to try this one out. and the best thing is, its super quick and light.....

    Giobbi's primavera pasta (from Jacques Pepin)
    tomato sauce:
    1 lb ripe tomatoes (2-3)
    1 tsp finely chopped garlic
    3/4 tsp salt
    1/2 tsp freshly ground pepper
    1/3 c olive oil
    1 c shredded basil leaves
    salt to taste

    pasta:
    8 cups of water
    penne or bow tie pasta (we actually made our own fettuccine and it was great)
    1/3 c finely grated Parmesan cheese

    for sauce:
    cut the tomatoes in half crosswise, parallel to the stems, and gently press out the seeds. cut into 1/2 inch pieces and put in a bowl large enough to hold the finished dish. add the remaining sauce ingredients and toss.

    for pasta:
    salt the water and bring to a boil. add the pasta and bring back to a boil. boil uncovered until al dente. add a 6 oz ladle of the hot pasta water to the tomato mixture. drain the pasta and add to the tomato mixture. toss thoroughly. divide into plates and sprinkle generously with Parmesan cheese!

    you will definitely want some crusty bread to sop up the delicious sauce that is left behind!

    Friday, July 25, 2008

    Zucchini, squash & broccoli with tomato crab meat sauce over whole wheat penne pasta

    Here's something I made last night after getting home at 9pm (not from work, don't worry, but from tennis). It was late, we were hungry and I wanted something light and quick. So here it is. It'll probably take me longer to post this than it took me to make this dish, but then, I'm a slow typist and I do have a way with the chef knife.

    While the salted water for pasta gets to a boil, heat up some vegetable oil in a pan over medium heat. Add chopped onion, garlic and hot red pepper flakes , cook until the garlic starts to become fragrant or to color a bit then add the chopped veggies. If you're not ready with the veggies, add some white wine, to cool down the cooking process a bit. The veggies do not need much cooking (as they are perfectly good raw), so 5 minutes after adding the veggies, add the chopped tomato and the crab meat (you don't need a lot, though the more the better) and turn off the heat. Sprinkle herbs on top of the veggies and in the cooked pasta and serve hot.


    The best thing about this dish is that it can be done really quickly and is really versatile. In the winter I make a white wine cream sauce , and I usually add whatever veggies I have in the fridge. Crab meat is pricey and hard to come by, but one can easily use shrimp or fish or mushrooms. The leftovers are great too (even cold, as I had today for lunch). I omitted any quantities from this recipe because I really like the freedom to add as much of something as I like or have, and as I need. Enjoy!

    Thursday, July 17, 2008

    top three!

    CSA'ers.

    change the title to 11 best foods you ARE eating and give yourself a pat on the back. here you are: chard, cabbage, and beets!
    http://well.blogs.nytimes.com/2008/06/30/the-11-best-foods-you-arent-eating/


    and a few quick suggestions for you on cooking with these three.

    1) cabbage: make kraut. you get the benefits of the cabbage PLUS the benefits of the organisms you cultivate in your own kitchen. sandorkraut has a great tutorial. mixing red and green cabbage together makes for gorgeous pink kraut. i recommend throwing in slices of garlic for its anti-inflammatory, potential heart health contributions, manganese and selenium.
    http://www.wildfermentation.com/resources.php?page=sauerkraut

    2) beets: grate and toss with plain yogurt, mint, lemon juice, and salt/pepper for a tasty lunch.

    3) chard: affectionately termed "chard-y pie" by friends, this stuff is amazing! i'd recommend kicking up the amount of chard in the filling (and feel free to throw in kale, beet greens, onion tops, etc). enjoy!

    Swiss Chard Tart with a Potato Crust (from Stonewall Kitchen's cookbook "Harvest")
    This tart makes two. If you want to save one for another day, cook them both in the oven, and store the second one in the fridge to reheat for dinner later in the week.

    1 ½ lbs Swiss chard, stems trimmed and leaves washed and coarsely chopped
    ¼ c. plus 2 Tbs. olive oil
    1 garlic clove, thinly sliced
    Salt and pepper
    2 large potatoes
    3 tsp. chopped fresh thyme
    1 heaping c. freshly grated Parmesan cheese
    2 large eggs
    2 c. ricotta

    1. In large skillet, heat oil over medium heat. Cook chard and garlic (half first, then the other half), stirring frequently. Season with salt and pepper. Cook for 10 minutes, stirring until the chard is just tender. Blot excess liquid with a paper towel and let cool.
    2. To make the crust, slice the potatoes very thinly. Create a thin layer of the potato slices on the bottom and the sides of two pie plates, slightly overlapping them to make a solid “crust”. Drizzle 2 Tbs. of oil over each crust, swirling the pan slightly so the oil drips to the bottom. Sprinkle each crust with ½ tsp. thyme, some salt and pepper, and a heaping ¼ c. of Parmesan.
    3. Preheat oven to 400 degrees. Whisk eggs in a large bowl and whisk in the ricotta, the remaining 2 tsp. thyme, and the remaining ½ c. Parmesan. Season with salt and pepper. Add the cooled sautéed chard and mix well. Divide the filling between the two crusts and press down lightly.
    4. Bake the tart for 20 minutes. Reduce heat to 350 degrees and bake for another 10 minutes. The potato curst should turn brown and crisp, and the filling should feel solid and firm when gently touched. Let cool about 5 minutes.

    be well!
    dana

    Tuesday, July 8, 2008

    choppin' broccoli

    a little shout out to dana carvey's catchy song......and that tastiest of vegetables.....broccoli! it's a great veggie and very good for you. a member of the Brassicaceae family, broccoli is high in vitamin C, soluble fiber and has potent anti-cancer properties. but don't boil for more than 10 minutes or broccoli will lose many of it's health benefits (steaming and stir frying don't seem to have that problem). there are many things to do with broccoli but i think the simpler the better.

    tonight we made a tasty side dish of broccoli and orzo....
    cook 1/2 cup orzo in 4 cups of water until tender (about 15 mins). drain, reserving 3/4 cup of water. saute 5 cloves of garlic (sliced) and 1/2 onion (diced) in 2 Tbsp olive oil until slightly translucent. add broccoli florets (about 4 cups) tossing in olive oil, garlic and onion. add reserved water, cover and steam for 5 mins. uncover and cook further to reduce liquid until almost evaporated (about 2 mins). combine with orzo. season with salt and pepper to taste and juice of half a lemon. enjoy!

    don't waste the broccoli stalks or leaves....peel the tough outer skin with a vegetable peeler and use for soups, stir fry and stocks!

    we also received green and red leaf lettuce, swiss and rainbow chard, onions, kale and red cabbage today so post your recipe ideas!

    Thursday, July 3, 2008

    Swiss Chard as Spanakopita

    We used up two weeks' worth of chard by making a modified Spanakopita! We found a whole wheat phyllo dough and used a "light" butter-like substance spray. It is best served fresh but I have been eating it for lunch as well. I used the leftover phyllo dough to make breakfast quiches with some of the kale, purple basil, etc.

    -Johanna

    2 1/4 cups minced white onion
    3/4 cup minced green onions
    3 garlic cloves, minced
    9 cups chopped trimmed Swiss chard (about 1 1/2 pounds)
    6 tablespoons chopped fresh parsley
    3 tablespoons minced fresh mint
    1 cup (4 ounces) crumbled feta cheese
    1/2 cup (2 ounces) freshly grated Parmesan cheese
    1/2 teaspoon salt
    1/4 teaspoon black pepper
    3 large egg whites
    10 (18 x 14-inch) sheets frozen phyllo dough, thawed

    Preheat oven to 350°.
    Heat a large nonstick skillet coated with cooking spray over medium-high heat. Add white onion; sauté 7 minutes or until golden. Add green onions and garlic, and sauté 1 minute. Stir in chard; cook 2 minutes or until chard wilts. Stir in parsley and mint, and cook 1 minute. Place in a large bowl; cool slightly. Stir in cheeses, salt, pepper, and egg whites.

    Place 1 phyllo sheet on a large cutting board (cover remaining phyllo to prevent drying), and coat with cooking spray. Top with 1 phyllo sheet, and coat with cooking spray. Repeat procedure with 3 additional sheets.

    Cut phyllo stack into a 14-inch square. Place square in center of a 13 x 9-inch baking dish coated with cooking spray, allowing phyllo to extend up long sides of dish. Cut 14 x 4-inch piece into 2 (7 x 4-inch) rectangles. Fold each rectangle in half lengthwise. Place a rectangle against each short side of dish. Spread the chard mixture evenly over phyllo.

    Place 1 phyllo sheet on a large cutting board (cover remaining phyllo to prevent drying), and coat with cooking spray. Top with 1 phyllo sheet, and coat with cooking spray. Repeat procedure with remaining phyllo sheets. Place 18 x 14-inch phyllo stack over chard mixture. Fold phyllo edges into center. Coat with cooking spray. Score phyllo by making 2 lengthwise cuts and 3 crosswise cuts to form 12 rectangles. Bake at 350° for 40 minutes or until golden.

    Note: Cut the phyllo stacks so they fit in and up the long side of the baking dish. Arrange folded section against short edges of dish to encase filling.

    Wednesday, July 2, 2008

    What to do with all these greens?

    welcome all CSA (Community Supported Agriculture) members at JHSPH and beyond to the one veggie at a time blog (protecting health, saving lives....). a place to share ideas, recipes, resources, etc. for what to do with all the greens and the many other common and exotic veggies we get each week. please use this space to share with and learn from our fellow organic veggie lovers in East Baltimore.

    So i will begin with a little something i invented that i am pretty proud of.....now mind you i rarely measure so you'll have to wing it but since this isn't a souffle you'll be fine!

    chard and potato gratin: slice small potatoes about 1/4 inch thick and blanch. shock in cold water to stop cooking and set aside. saute minced garlic and chopped onions in olive oil. once onions are translucent add chard (stems removed) and a little bit of water to steam. season with salt and pepper. in a small casserole or baking dish put a layer of the chard mixture down. cover the layer with shredded parmesan. arrange a flat layer of potatoes on top making sure to cover all the chard mixture and season with salt and pepper. cover with another layer of parmesan and repeat. end with a layer of parmesan. bake covered in a 350 degree oven for about 15 mins. remove cover and let bake another few minutes to allow the cheese to get all bubbly and yummy. enjoy!

    now it's your turn to share...